Green coffee beans cost $4 to $8 per pound. A pound of specialty roasted coffee costs $16 to $24. The math alone makes home roasting interesting, but the real argument is freshness: roasted coffee hits peak flavor between 7 and 21 days after roasting (and needs at least 3-4 days of rest before it’s ready to brew). Unless you live near a roaster who posts roast dates on every bag, you are almost certainly drinking coffee that has already passed its peak by the time you open it.
Home roasting fixes that. It also gives you direct control over how your coffee tastes, which turns out to be more precise and more learnable than most people expect. The chemical reactions inside a roasting bean follow predictable patterns. If you understand those patterns, you can steer the results from your very first batch.
What Happens Inside a Roasting Bean
Six things happen in sequence when you apply heat to a green coffee bean. Each one is visible, audible, or both. Knowing what to watch for makes the process far less mysterious than it sounds.
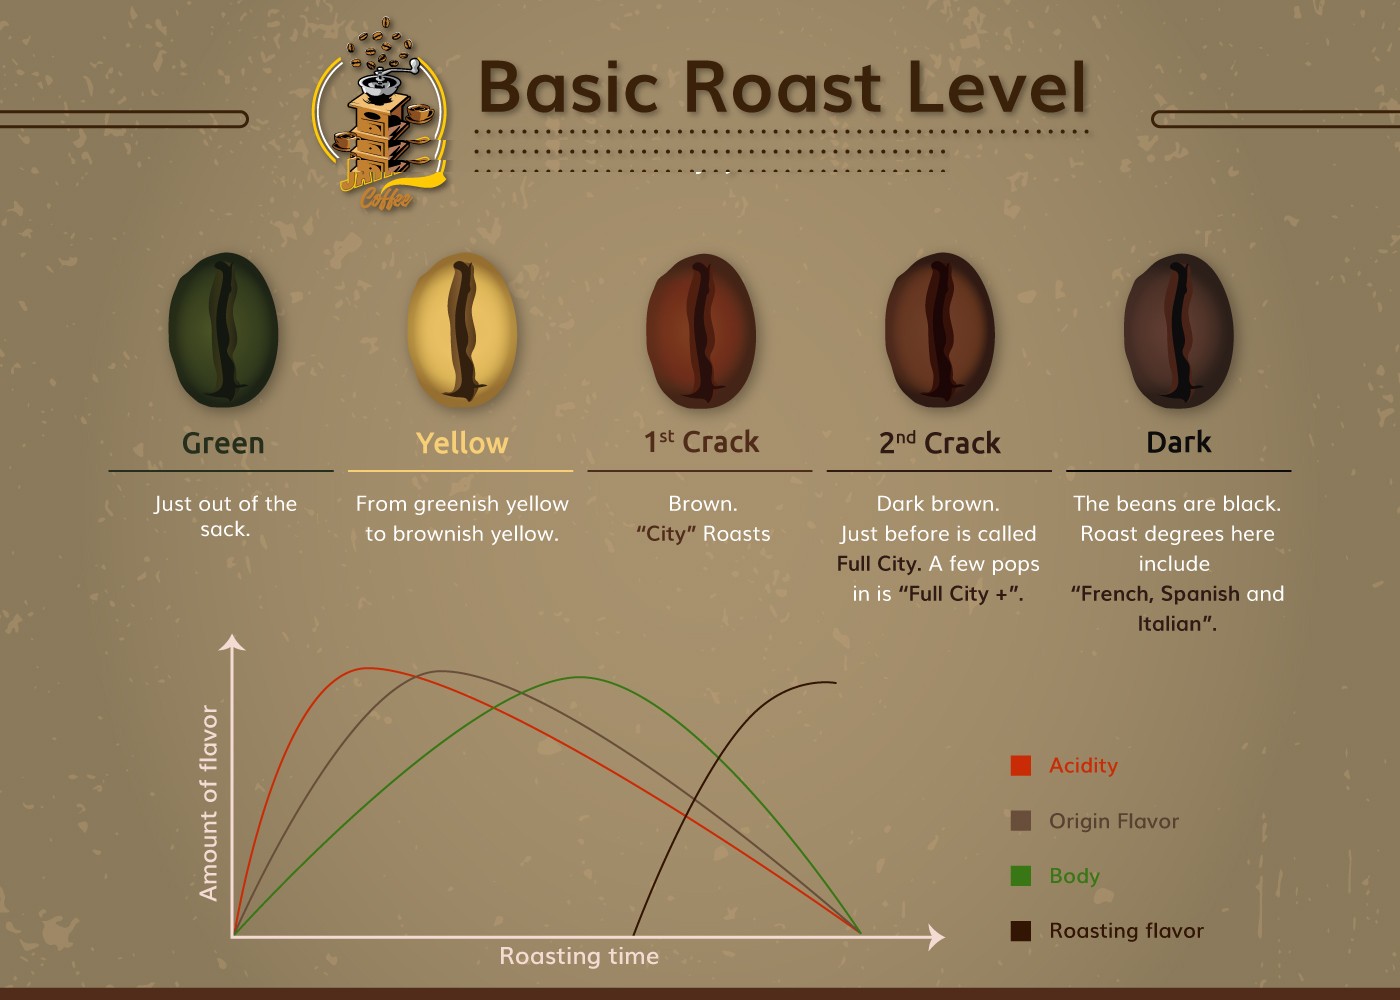
Stage 1: Drying (Green to Yellow)
Green coffee contains roughly 7-11% moisture. Heat drives off that moisture as steam. The beans turn from green to yellow, and you’ll smell something like wet hay or grass. No flavor is developing yet. This stage typically takes about 4 minutes and gets the bean up to around 150C (302F).
This phase matters more than it seems. The rate at which you dry the bean sets up the internal pressure dynamics that will affect every reaction that follows. Too much heat too fast can scorch the surface or cause “tipping,” where steam vents violently from the bean’s embryo tip. For a beginner using simple equipment, moderate heat and constant agitation are enough to get through drying without problems.
Stage 2: Maillard Reaction (Yellow to Brown, 150-200C)
The same reaction that browns bread crust and caramelizes onions takes over. Amino acids combine with reducing sugars to produce melanoidins (brown polymers that give coffee its color, body, and mouthfeel) and over 600 volatile flavor compounds (Hoos). Nutty, caramelly aromas start filling the room. The beans shift from yellow to tan to light brown.
Rob Hoos, a production roaster who wrote one of the more useful books on this subject, calls the interval from color change to first crack the “MAI phase” (Maillard-to-first-crack interval). It controls body and flavor complexity. A longer MAI develops heavier body and more complex flavors. A shorter one produces lighter, cleaner, simpler cups. For a home roaster, this translates to a practical decision: keep the heat high and push toward first crack quickly, or ease back and let the browning phase stretch?
Stage 3: Caramelization (~160-200C)
Overlapping with Maillard, sucrose begins breaking down. This produces hundreds of additional flavor compounds. Here is the counterintuitive part: more caramelization does not mean more sweetness. The sugar molecules are being destroyed and rearranged. Extended caramelization actually reduces perceived sweetness because the precursor sugars get consumed — nearly 100% of sucrose is destroyed during roasting. Hoffmann describes sweetness as following a bell curve. Too light and you get sour, grassy character. The peak is somewhere in the medium range. Go too dark and you land in bitter, ashy territory. Hoos’s research shows that the sweetness level is driven more by terminal temperature than by time.
Stage 4: First Crack (~196C / 385F)
This is the moment. CO2 and water vapor have been building pressure inside the bean, and now they fracture the cell structure. You’ll hear a sharp popping sound, similar to popcorn but lighter and more crackling. The beans roughly double in size.
First crack is your earliest possible stopping point for a drinkable roast. Pull the beans shortly after first crack and you have a light roast. The total time from start to first crack on most home setups runs 7-10 minutes.
Stage 5: Development (Between Cracks, 196-212C)
After first crack, the roaster has the most control. This is where sharp acids soften, sweetness integrates, and body fills in. Hoos’s research shows that development time primarily controls organic acid balance. Too short and you get metallic bitterness from excess chlorogenic acids (CGAs). Too long and acids degrade entirely, leaving a flat, dull cup. The sweet spot is where enough CGAs have broken down but citric and malic acids (the pleasant, fruity ones) still remain.
For home roasting, 1-2 minutes of development after first crack ends is a reasonable range. Less for a bright, acidic light roast. More for a sweeter, rounder medium roast.
Stage 6: Second Crack (212-218C / 414-424F)
A second round of cracking means the bean’s internal structure is fracturing further. Oils begin migrating to the surface. You are now in dark roast territory. Go much beyond second crack and the bean’s origin character disappears, replaced by smoky, ashy, and bitter flavors driven by thermal decomposition rather than the bean’s own chemistry.
For beginners, second crack is a good “stop here or before” signal. There is no reason to push past it while you are learning.
The Four-Lever Framework (Simplified for Home Roasting)
Hoos breaks roasting into four independent controls. Professional roasters manipulate each one with precision, but even with a popcorn popper, understanding the levers helps you interpret what you are tasting.
Lever 1: Drying (sets momentum). A longer drying phase at lower heat produces lower internal bean pressure. A shorter, hotter drying phase creates higher pressure and faster subsequent reactions. For home roasting, just keep the heat moderate and the beans moving. You do not need to micromanage this.
Lever 2: MAI (controls body and complexity). The time between yellowing and first crack. Want a lighter, cleaner cup? Get to first crack faster. Want a heavier, more complex cup with chocolate and molasses notes? Slow down. Hoos’s cupping data across five origins consistently shows body scores increasing with longer MAI.
Lever 3: Development (controls acidity). Time between first crack and when you stop the roast. This is your most direct lever at home. Cut it short for a bright, punchy roast. Extend it for sweetness and balance.
Lever 4: End temperature (controls sweetness/caramelization). Hoos found that sweetness is driven more by the final temperature the bean reaches than by how long it spent developing. Even a 6F difference in end temperature produced measurably different sweetness scores in blind cupping. At home you probably cannot measure bean temperature precisely, but you can calibrate by paying attention to how far past first crack you go and comparing results batch to batch.
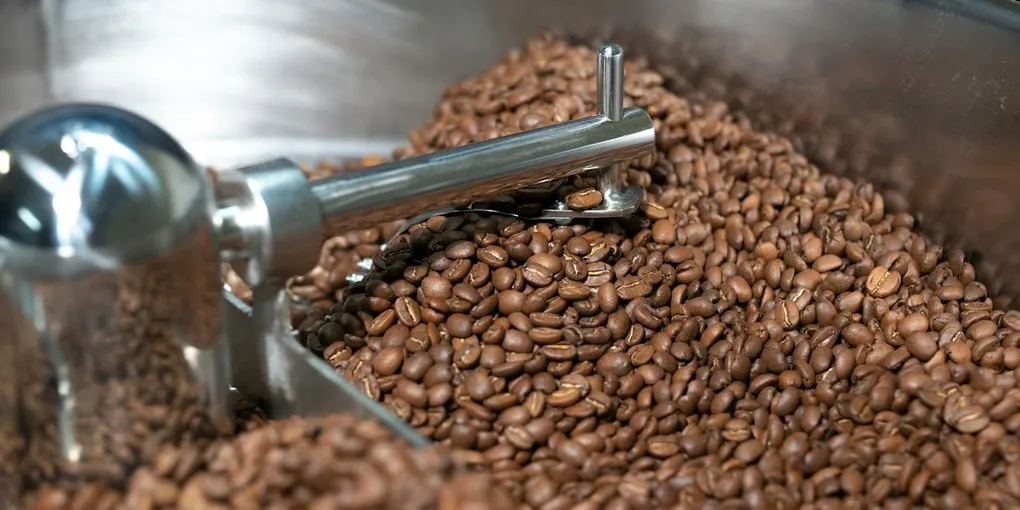
Equipment: What Actually Works
You do not need a dedicated roaster to start. You need a heat source and a way to keep the beans moving.
Popcorn Popper (Best Starter Option)
A hot-air popcorn popper (the kind with vents on the sides of the chamber, not the bottom) is the most commonly recommended entry point for home roasting. It roasts 80-100 grams in about 5-8 minutes, produces reasonably even results, and costs about $20-$30. The forced air keeps beans in motion, which prevents scorching. Downsides: small batch size, limited temperature control, and the heating element was not designed for repeated 10-minute high-heat sessions, so longevity varies.
Cast Iron Skillet or Wok
Pan roasting on a stovetop works, but demands constant stirring to prevent uneven roasting. It is loud, smoky, and less consistent than air-based methods. The advantage is that you already own the equipment. Use a heavy pan over medium-high heat, keep the beans moving constantly, and accept some unevenness in your first batches.
Dedicated Home Roasters
If you know you want to pursue this, purpose-built home roasters give you more control and repeatability:
- Fresh Roast SR540/800: Air roasters with fan speed and heat controls. 120-150g capacity. About $190-$280. Good entry-level dedicated machine.
- Behmor 2000AB Plus: Drum roaster. Up to 450g capacity, built-in smoke suppression. Around $370. Closer to how commercial roasting works.
- Gene Cafe CBR-101: Off-axis drum design, chaff collector, 250g capacity. About $500+. Produces very consistent results.
For your first roast, a popcorn popper or even a cast iron skillet is plenty. Equipment upgrades make sense after you have roasted enough batches to know what you are trying to improve.
Your First Roast: Step by Step
This walkthrough assumes a hot-air popcorn popper, but the stages and timing apply to any method.
1. Set up outdoors or near an open window. Roasting produces smoke, especially past first crack. Chaff (thin papery skin from the beans) will blow off during roasting. Do this outside if possible, or directly under your range hood.
2. Measure 80-100 grams of green coffee. Too little and the beans move too freely without absorbing enough heat. Too much and they cannot circulate properly.
3. Preheat the popper for 30 seconds, then add the beans.
4. Watch and listen. In the first 3-4 minutes, beans will go from green to yellow. You will smell wet grass turning into a bread-like aroma. Keep checking that beans are circulating. If they are not moving, shake the popper or reduce the quantity slightly.
5. At 5-7 minutes, first crack begins. You will hear distinct pops, like small firecrackers. This is your decision point. From here:
- Light roast: Wait for first crack to finish (the popping slows and nearly stops). Pull the beans. Total roast time around 7-8 minutes.
- Medium roast: Continue 60-90 seconds past the end of first crack. The beans will be medium brown with no visible oil. Total roast time around 9-10 minutes.
- Dark roast: Continue until you hear second crack begin (faster, sharper crackling). Pull immediately unless you want a very dark roast. Total roast time around 10-12 minutes.
6. Cool the beans immediately. Dump them into a metal colander or baking sheet and stir or shake them in open air. Beans continue roasting from residual heat if you do not cool them. Two minutes of active cooling is usually enough.
7. Weigh the roasted beans. Compare to your starting weight. Hoos uses weight loss as a roast degree indicator: under 11% is underdeveloped, 11-13% is light, 14-16% is medium, 17-18% is dark. This is more reliable than eyeballing color, especially when you are new.
Common Mistakes and How to Fix Them
Stopping too early. Underdeveloped coffee tastes woody, bready, or like raw grain. This is not “a light roast.” Light roasts need enough development time after first crack for the acids to resolve. If your light roast tastes flat and grassy rather than bright and sweet, you pulled too soon.
Too much heat, not enough time. Rushing to first crack with maximum heat scorches the bean surface while the interior remains underdeveloped. The result is a roast that looks right but tastes papery or ashy. Moderate, steady heat produces better results than cranking everything to maximum.
Not cooling fast enough. Beans sitting in a hot vessel after you stop the heat source keep developing. If you aimed for medium but dumped the beans into a ceramic bowl, you may end up with medium-dark. Use a metal colander with holes and shake or fan the beans to stop the roast.
Brewing too soon. Freshly roasted coffee needs to rest. Right after roasting, the beans are saturated with CO2, which interferes with water penetrating the grounds and extracting flavor evenly. Wait at least 3-4 days. The peak window is 7-21 days post-roast. For more on this timeline, see the coffee freshness guide.
Expecting consistency on batch one. Your first roast will probably not be your best. The point is to taste it, compare it to what you know, and adjust. Roasting is iterative. Keep notes on time, heat level, weight loss, and flavor impressions. By batch four or five, you will be making coffee that is noticeably better than most of what you can buy at a grocery store.
Resting and Storage After Roasting
Three things degrade roasted coffee over time (Gagné): CO2 escaping from the beans, volatile aroma compounds evaporating, and oils migrating to the surface where they oxidize. Fresh beans do not look oily. Oily beans are often stale.
After roasting, store beans in an airtight container at room temperature, away from light and heat. A mason jar works. A bag with a one-way valve is better because it lets CO2 escape without letting oxygen in. Do not refrigerate — coffee absorbs odors and the moisture fluctuations do more harm than good.
If you roast more than you can use in three weeks, freeze the surplus. Freezing drops oxidation dramatically and preserves quality for months. Seal the beans well, do not thaw and refreeze, and consider grinding directly from frozen. Cold beans fracture more uniformly, which can actually improve your grind consistency. For the full storage guide, see how to store coffee beans.
Where to Go From Here
Home roasting becomes a different hobby depending on how far you take it. Some people roast one popcorn popper batch a week. Others profile roasts with logging software. Both produce coffee fresher than anything on a store shelf.
For background on roast level and flavor, see coffee roast levels explained. For the full commercial roasting process, see how is coffee roasted. For dialing in the grind for freshly roasted beans, the coffee grind size guide covers every method. And once you are roasting confidently, creating your own coffee blends at home is a natural next step.
Frequently Asked Questions
- Is home coffee roasting actually cheaper than buying roasted beans?
- Green coffee typically costs $4 to $8 per pound, while specialty roasted coffee runs $16 to $24 per pound. Even accounting for weight loss during roasting (beans lose 11-18% of their weight), you're looking at roughly 50-70% savings on bean cost. Equipment cost depends on your approach — a popcorn popper is about $20-$30, a dedicated home roaster is $190 to $500+. If you drink a pound a week, a popcorn popper pays for itself in 2-3 weeks.
- How long does a home roast take from start to finish?
- The actual roasting takes 7-12 minutes depending on your target roast level and equipment. A popcorn popper reaches first crack in about 5-7 minutes. Add 2-3 minutes for cooling and you're looking at about 10-15 minutes of active time per batch. The waiting period afterward is longer — beans need 3-4 days of rest before they're ready to brew, and they hit peak flavor between 7 and 21 days post-roast.
- What does first crack sound like?
- Sharp, distinct pops — lighter and more crackling than popcorn, but similar in rhythm. It starts with isolated pops, builds to a rolling series of cracks over about 60-90 seconds, then tapers off. You will not miss it if you're paying attention. Second crack, which comes later, sounds tighter and faster — more like Rice Krispies in milk than popcorn. The gap between first and second crack is your primary control window.
- Where can you buy green coffee beans for home roasting?
- Sweet Maria's (sweetmarias.com) is the most established retailer for home roasters in the US — they carry a rotating selection of single-origin greens with detailed tasting notes and roasting guidance. Happy Mug Coffee and Bodhi Leaf are other popular options. Most sell in 1-5 pound quantities. Green coffee stores well for months at room temperature (up to a year if sealed properly), so buying several origins at once and experimenting is practical and cost-effective.
- How bad is the smoke from home roasting?
- Light roasts (stopping at or just after first crack) produce moderate smoke — comparable to pan-frying food. Medium roasts produce more. Dark roasts past second crack produce substantial smoke that will set off most indoor smoke detectors. Chaff — the thin papery skin that separates from the bean during roasting — also flies around with air-based methods. Roast outdoors, on a porch, or directly under a strong range hood. A dedicated roaster like the Behmor has built-in smoke suppression, which helps for indoor use.
- How long should I rest beans before brewing after roasting?
- At least 3-4 days. Freshly roasted beans are saturated with CO2 from the roasting reactions, which physically interferes with water contacting the grounds during brewing. The result is uneven extraction and a cup that tastes sharp, hollow, or just 'off.' After 3-4 days of resting and off-gassing, extraction becomes much more even. Peak freshness runs from about 7 to 21 days post-roast.
- Can you roast coffee in a regular oven?
- You can, but the results are inconsistent. Spread beans in a single layer on a perforated baking sheet at 230-250°C (450-475°F) and stir every 2-3 minutes. The problems: ovens do not circulate air well enough for even roasting, you cannot hear first crack over the oven fan, temperature control is imprecise, and smoke management is difficult with the oven door closed. It works as a proof-of-concept, but a $25 popcorn popper produces noticeably better results with less effort.
Some links on this page are affiliate links. If you purchase through them, we earn a small commission at no extra cost to you.