There’s one coffee symptom that confuses people more than any other: a cup that tastes simultaneously sour and bitter. Sour means under-extracted. Bitter means over-extracted. How can it be both at the same time?
The answer is channeling — and once you understand it, the contradiction makes perfect sense.
Channeling happens when water doesn’t flow evenly through the coffee bed. It finds the path of least resistance — a crack, a gap, a thin spot — and rushes through that channel. The coffee along the channel gets blasted with far more water than it should, overextracting into bitterness. The coffee everywhere else barely gets touched, underextracting into sourness. You taste both in the same sip.
The frustrating part is that the average extraction yield might look fine. If you measured TDS and calculated EY, you might land right at 20% — technically in the sweet spot. But 20% average means nothing when half the bed is at 28% (bitter) and the other half is at 12% (sour). Jonathan Gagné’s research confirms this: a brew at 20% EY with even extraction will taste dramatically better than one at 20% with uneven extraction. The average hides the problem.
Here’s how to identify channeling and fix it — for both pour over and espresso.
What Causes Channeling in Pour Over
Uneven Grind Distribution
This is the root cause in most cases. Cheap grinders produce a wide range of particle sizes — very fine particles (fines) mixed with much larger ones (boulders). During brewing, the fines migrate downward through the coffee bed and accumulate near the filter. They form dense clusters that restrict water flow. Water diverts around these clusters, creating channels through the coarser areas.
The result: the fines zones overextract. The coarse zones underextract. Average extraction might be “fine.” Taste is not.
This is why grinder quality matters more than almost any other variable. The fix isn’t technique — it’s fewer fines to begin with. A quality burr grinder ($150+) produces a tighter particle size distribution, which means a more uniform bed, which means more even water flow.
Pouring Too Hard or Fast
Aggressive pouring punches holes in the coffee bed. Each impact creates a crater, and the coffee under the crater gets compacted while the area around it loosens. Water flows through the loose areas and avoids the compacted ones. You’re engineering channels with every heavy pour.
The V60 is particularly sensitive to this because its cone shape and large single hole provide minimal resistance. The coffee bed IS the flow control — if you damage it with an aggressive pour, you lose the only thing regulating extraction evenness.
Pouring on the Filter Walls
Water that hits the filter paper instead of the coffee bed runs straight through without touching any grounds. This is called bypass — the water bypasses the coffee entirely. It dilutes the cup (reduces TDS) without contributing to extraction. Worse, it can wash fines down the sidewall, creating pockets of dense sludge that further disrupt the bed.
Keep your pour within the inner two-thirds of the bed surface. Don’t go to the edges.
Uneven Bed Surface
If your coffee bed is tilted, mounded in the center, or has high and low spots, water pools in the low areas and barely touches the high areas. Same pattern: overextraction in the wet zones, underextraction in the dry zones.
Before pouring, level the bed. After adding your grounds to the dripper, give it a gentle shake or tap the side to settle the surface flat. After the bloom, a gentle swirl (the “Rao spin”) settles the bed into an even, flat layer.
Skipping or Rushing the Bloom
Fresh coffee releases significant CO2 when it contacts hot water. If you skip the bloom step and pour the full volume immediately, CO2 escapes violently through the bed during the main brew, creating gas channels. These channels persist through the entire drawdown, causing uneven extraction.
A proper bloom uses 2–3x the coffee weight in water (e.g., 30–50g of water on 16g of coffee) and rests for 30–45 seconds. This gives CO2 time to escape before you begin the main extraction. The bed settles, wets uniformly, and you pour onto a stable, degassed surface.
What Causes Channeling in Espresso
Espresso amplifies every channeling problem because of the extreme pressure involved. Nine bars of pressure will exploit any weakness in the coffee puck instantly.
Uneven Distribution in the Portafilter
If the coffee lands in a heap in one part of the portafilter basket, the thin areas have less resistance than the thick areas. Water rushes through the thin spots. The thick spots barely extract. This is the most common espresso channeling cause and the easiest to fix.
The WDT (Weiss Distribution Technique): Use a thin needle tool (a paper clip bent into shape, or a purpose-built WDT tool with 0.3–0.4mm acupuncture needles) to stir and break up the grounds in the portafilter before tamping. This distributes the coffee evenly, breaks up clumps, and eliminates the dense pockets that cause channels.
Clumping from Static
Espresso-fine grounds generate static electricity during grinding. The particles clump together instead of falling evenly into the basket. These clumps create density variations in the puck — the clump itself is dense, the area around it is loose. Water avoids the dense zones and floods the loose ones.
The Ross Droplet Technique (RDT) — spraying 1–2 mist sprays of water on the beans before grinding — eliminates static cling. A 2023 study confirmed that RDT alters particle size distribution, reduces triboelectric charging, and measurably improves puck flow rates and extraction quality.
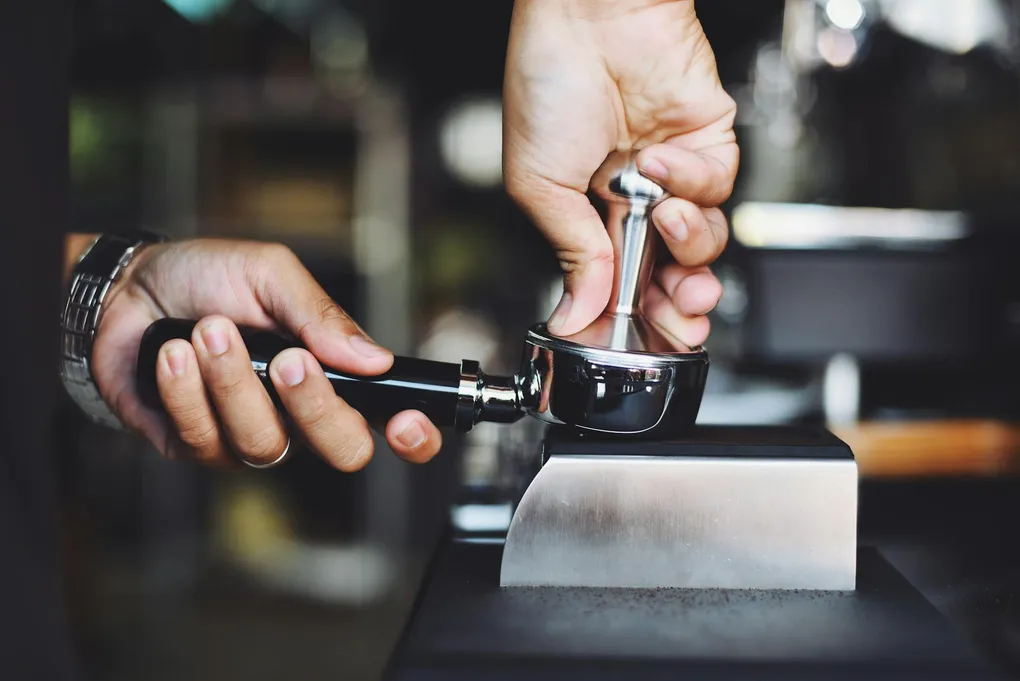
Inconsistent Tamp
Tamping doesn’t need to be hard — the 9-bar pump exerts over 500 pounds of force on the puck, making your 30–50 pounds negligible. What tamping needs to be is level. A tilted tamp creates a thin side and a thick side. Water blasts through the thin side.
Focus on keeping the tamp perfectly horizontal. Press straight down. Use your forearm, not your wrist. Calibrated tampers ($50–100) with built-in depth stops guarantee level contact.
Grind Too Fine
Counter-intuitively, going too fine in espresso can cause channeling. An excessively fine grind creates a puck so dense that the pressurized water can’t permeate it uniformly. The water finds any structural weakness — a clump boundary, an air pocket, a slight density variation — and forces a channel. The puck fractures under pressure rather than flowing evenly.
Hendon’s 2020 research in Matter demonstrated that coarser grinds with less coffee (15g instead of 20g) produced more reproducible shots by reducing channeling. The recommendation: if your shots are inconsistent, try grinding slightly coarser and running a slightly shorter shot.
How to Diagnose Channeling
Look at the Spent Bed
Pour over: After brewing, lift the filter and examine the coffee bed. It should be flat, even, and uniformly wet with no visible cracks, dry spots, or dark streaks. If you see channels (grooves carved through the bed), divots, or areas that look significantly lighter or darker than others, channeling occurred.
Espresso: Remove the portafilter after pulling the shot. The spent puck should be firm, flat, and evenly saturated. If you see a hole, a crack, or a wet spot surrounded by dry areas, that’s where the water channeled.
Taste the Hallmark
The signature of channeling is simultaneous sourness and bitterness — especially a sour front note followed by a bitter, ashy finish. This pattern is almost impossible to produce through other means. A uniformly over-extracted cup is purely bitter. A uniformly under-extracted cup is purely sour. Only uneven extraction produces both.
If you’re tasting this and can’t figure out why, the Fix My Coffee diagnostic identifies “Sour AND Bitter” as its own distinct symptom category — separate from sour-only or bitter-only — because the causes and fixes are different. Understanding strength vs. extraction as independent variables is the key to diagnosing these problems.
Time the Drawdown
For pour over, compare your actual drawdown time to the expected time for your method (V60: 2:30–3:30, Chemex: 3:30–4:30, Kalita: 3:00–4:00). If the drawdown is significantly faster than expected, water is finding short paths through the bed. If it’s much slower, fines accumulation is clogging parts of the bed, which often leads to channeling in the areas that aren’t clogged.
Fixes Ranked by Impact
1. Upgrade Grind Consistency
The single most effective fix. A grinder that produces fewer fines and a tighter particle distribution reduces channeling at its source. You can’t technique your way out of a bad grind. This is the foundation that everything else builds on. See our grind size guide for micron ranges by method.
Going from a blade grinder to a burr grinder eliminates the most extreme fines. Going from a cheap burr to a quality burr ($150+) narrows the particle distribution further. Going from a standard burr to an aligned flat burr with SSP-level uniformity is the endgame — but even the first step makes a massive difference.
2. WDT (Espresso Only)
Three seconds of needle stirring in the portafilter costs nothing and eliminates clumps — the most common cause of espresso channeling. This should be part of every espresso workflow.
3. Pour Technique (Pour Over)
Slow, concentric circles starting from the center and spiraling outward. Keep the stream thin — you’re placing water gently on the bed, not hosing it down. Never pour on the walls. Keep the kettle close to the bed surface (2–3 inches) to reduce impact. Maintain a consistent flow rate.
A gooseneck kettle is essential for this level of control. You cannot make precise, gentle concentric pours from a regular kettle. See our pour over guide for the complete technique.
4. The Rao Spin
After the bloom (and optionally after the final pour), give the dripper a gentle swirl — pick it up and make a single circular motion. This settles the coffee bed into a flat, uniform layer, closing any channels that formed during pouring. Named after Scott Rao, who popularized it. Takes two seconds, costs nothing.
5. Proper Bloom
2–3x coffee weight in water, 30–45 seconds of rest. Don’t skip it, don’t rush it. A gentle stir with a spoon or chopstick during the bloom can help ensure all grounds are saturated — the “bloom stir” technique. Just don’t agitate aggressively.
6. Sift Out Fines
This is the nuclear option. Use a Kruve sieve (200–400µm mesh) to physically remove the finest particles before brewing. The result: a dramatically more uniform bed with virtually no channeling. The cost is time (30 seconds per brew), waste (you lose 10–15% of your coffee as fines), and a slightly thinner body (fines contribute to mouthfeel).
It works. Most people consider it too fussy for daily use but eye-opening as a one-time experiment to see what channeling-free coffee actually tastes like.
7. Switch to a Flat-Bottom Brewer
If you’re fighting channeling on a V60, consider switching to a Kalita Wave or Clever Dripper. Flat-bottom brewers naturally produce a more even extraction because the bed depth is uniform across the entire surface. Conical drippers like the V60 have thicker bed at the center and thinner at the edges, which creates inherent flow rate variations.
Gagné’s research found that flat-bottom drippers produce sweeter, higher-extraction brews than conical — likely because of more uniform extraction and less bypass. This isn’t a “worse” brewer — it’s a more forgiving one.
The Bloom and CO2
Fresh coffee contains trapped CO2 from the roasting process. When hot water contacts fresh grounds, CO2 releases rapidly — that vigorous bubbling you see during the bloom. If CO2 is still escaping during the main brew, it creates gas pockets in the bed that disrupt water flow.
Gagné clarifies an important nuance: the bloom is primarily about wetting the grounds — establishing capillary contact between water and coffee particles — not just about degassing. Both matter, but getting every particle uniformly saturated is what prevents dry pockets that later become channel entry points.
Staler coffee produces a less dramatic bloom (less CO2) but can actually be easier to brew evenly for this reason. Extremely fresh coffee (2–5 days post-roast) has so much CO2 that the bloom can be turbulent — consider a longer bloom (45–60 seconds) for very fresh beans. Check our freshness tracker to see where your beans are in their lifecycle.
What “Even Extraction” Actually Tastes Like
If you’ve been drinking channeled coffee without knowing it, your first properly even extraction is a revelation. The flavors are cleaner — each note is distinct rather than blurred. Sweetness comes through clearly because it’s not being masked by simultaneous bitterness. The finish is clean and pleasant rather than harsh or drying.
The improvement is disproportionate to the effort involved. A single Rao spin, a mindful pour, and a proper bloom take less than a minute of additional attention and can transform a muddled cup into a clear, sweet one.
Sources & Further Reading
- Gagné, J. The Physics of Filter Coffee — particle migration, bed structure, channeling mechanics
- Hendon, C. et al. (2020, Matter) — coarser grind espresso and channeling reduction
- Rao, S. Everything but Espresso — Rao spin technique, bloom best practices
- Hoffmann, J. How to Make the Best Coffee at Home — pour technique guidance
Frequently Asked Questions
- What does channeling taste like in coffee?
- Simultaneously sour and bitter — a sharp, acidic front note followed by a harsh, ashy finish. This pattern is the hallmark of uneven extraction: some grounds were over-extracted (bitter) while others were under-extracted (sour). If your coffee is just sour or just bitter, that's a different problem (uniform under- or over-extraction). Both at once almost always means channeling.
- What causes channeling in pour over?
- The most common causes, in order: (1) inconsistent grind — fines clog parts of the bed, water diverts around them; (2) pouring too hard — creates craters and disturbs the bed; (3) pouring on the filter walls — water bypasses the coffee entirely; (4) uneven bed surface — water pools in low spots; (5) skipping the bloom — trapped CO2 creates gas channels during brewing.
- Will a better grinder fix channeling?
- In most cases, yes — grind consistency is the single biggest factor. A quality burr grinder produces fewer fines and a tighter particle size distribution, which means a more uniform coffee bed and more even water flow. Going from a blade grinder to any burr grinder is a massive improvement. Going from a budget burr to a quality burr ($150+) is the second biggest leap.
- What is the Rao spin and does it actually help?
- After the bloom (or after the final pour), gently swirl the dripper in a single circular motion. This settles the coffee bed into a flat, even layer, closing any channels that formed during pouring. It was popularized by Scott Rao and takes about two seconds. It genuinely helps — an uneven bed is one of the primary causes of channeling, and the spin fixes it with minimal effort.
- Should I sift out fines before brewing?
- Sifting through a Kruve sieve (200–400 micron mesh) removes the finest particles that cause bed clogging and channeling. It produces a noticeably cleaner, more even cup. The downsides: it takes 30 seconds per brew, wastes 10–15% of your ground coffee, and reduces body slightly. Worth trying once to experience channeling-free coffee, but most people find it too fussy for daily use.